


Case Study 1:

Case Study 2:

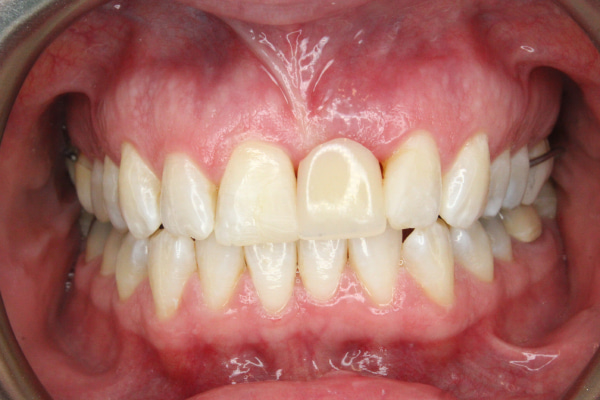
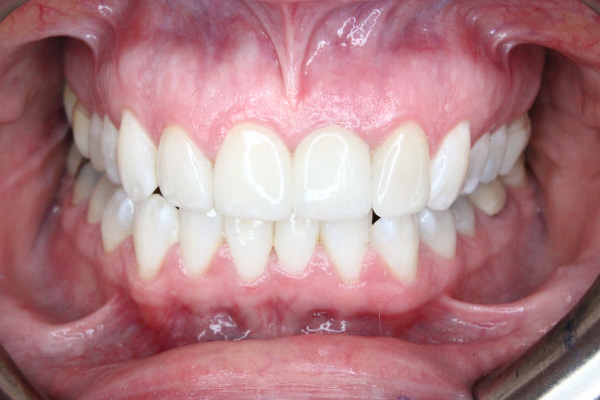
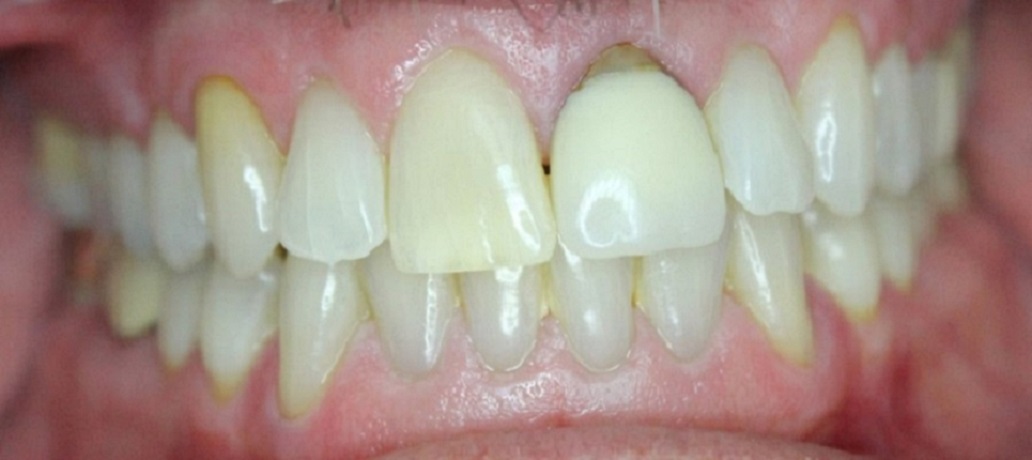
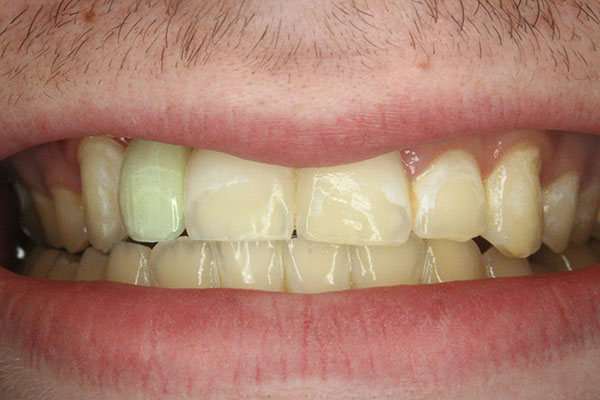
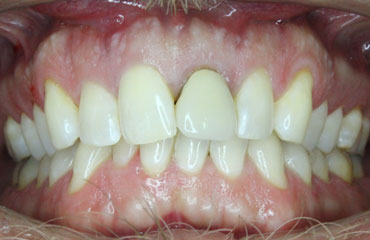
Internal Bleaching or Walking Bleach Technique: There are a number of reasons a front tooth can turn dark over time. Trauma, previous root canal, internal or external resorption are the most common reasons we see discoloration of a tooth. Unlike traditional bleaching to treat extrinsic (or external) stain that may be treated with a bleaching tray and carbamide peroxide, or in office with our Zoom Whitening System; the darkening of this tooth is from intrinsic (or internal) factors. This means we have to bleach this tooth from the inside out. This before and after is of a patient who had dental trauma at a young age; and, as a result, the tooth turned dark. The tooth is considered dead or necrotic, but it is not necessarily infected. We perform a root canal to gain access to the inside of tooth and then place an internal bleaching material made up of sodium perborate and carbamide peroxide. Some teeth respond quicker than others, this tooth required two sessions of internal bleaching to complete. The result speaks for itself. Our patient who was once embarrassed to smile or post any pictures of her smiling with her kids now takes and post as many photos as possible and smiles with confidence. It was a great day for all of us and we feel lucky that we are able to provide this service for our patients. Alternative options would be to do a porcelain veneer but results, in this case, can be less predictable when treating a single tooth.
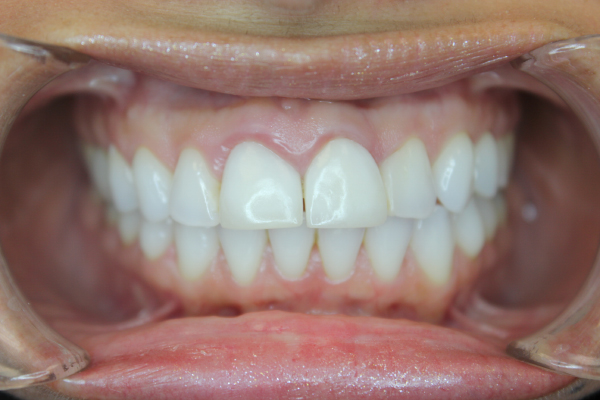
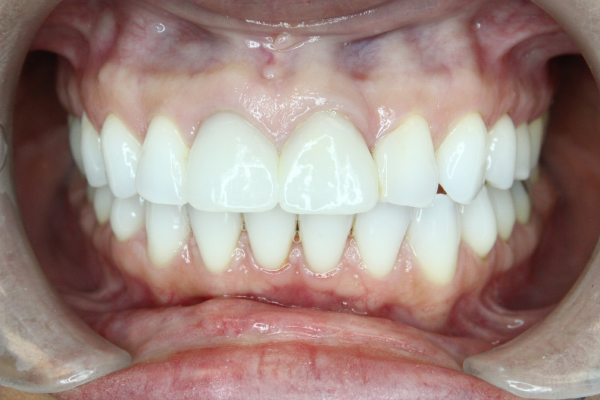
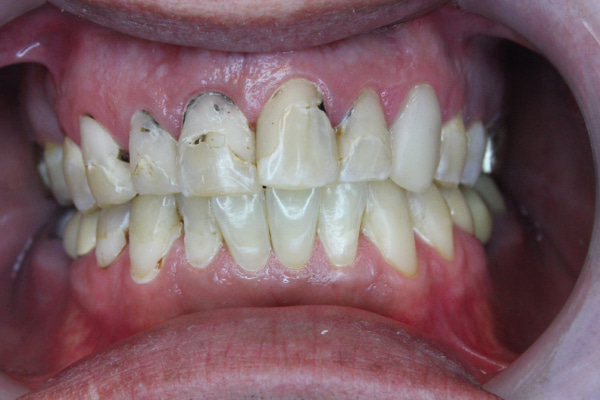
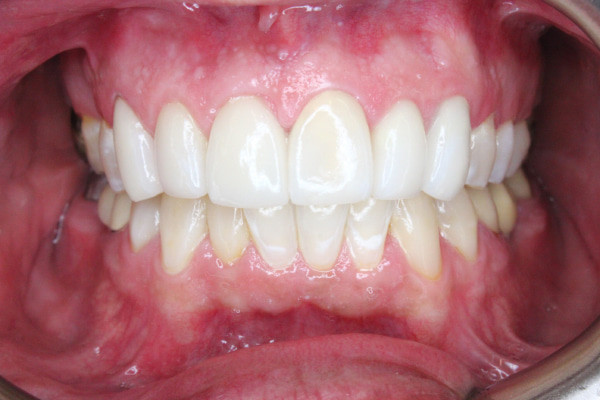
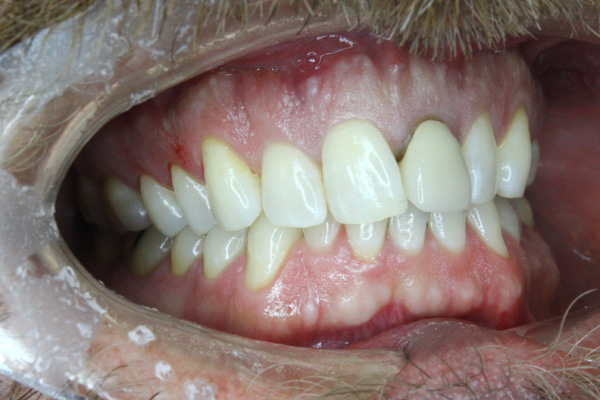
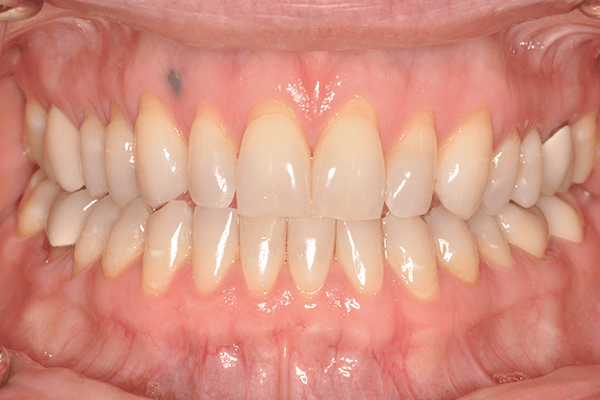
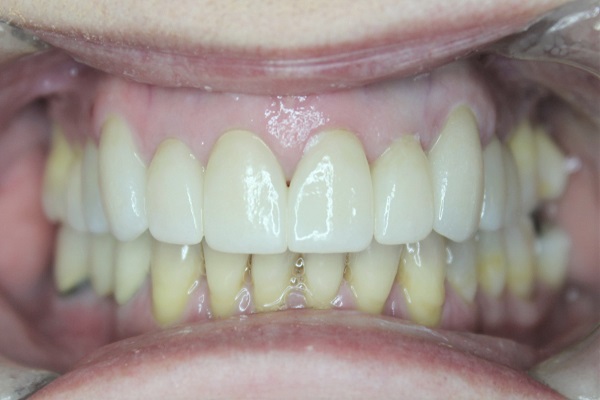
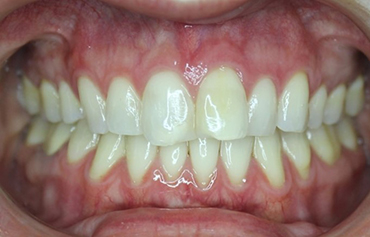
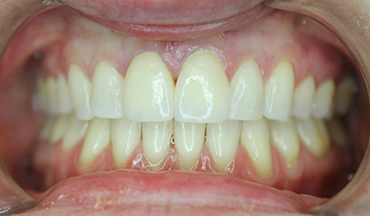
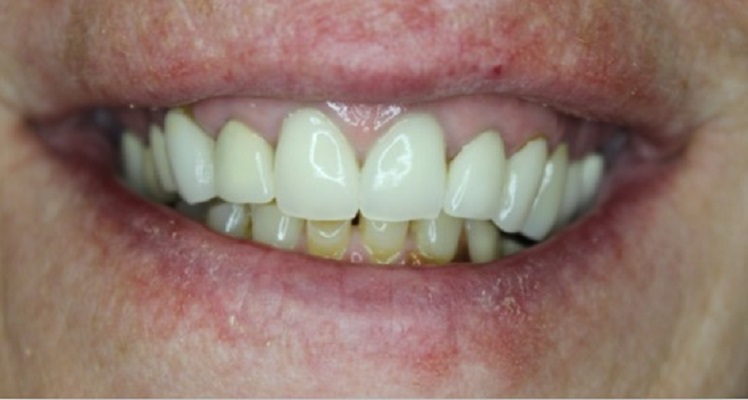
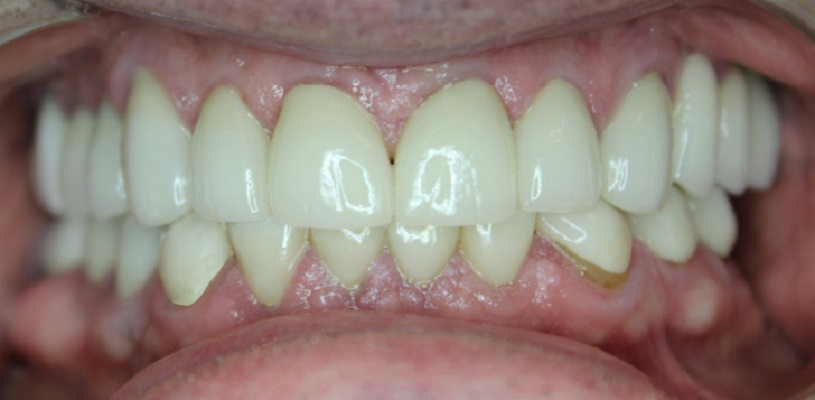
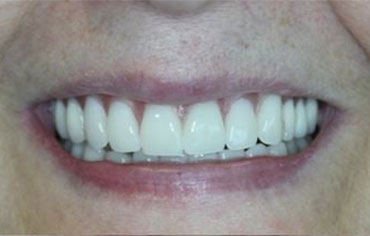
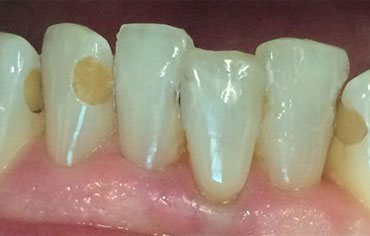
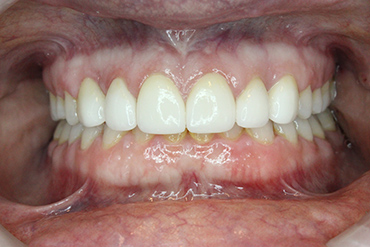
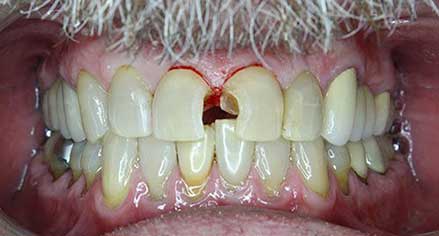
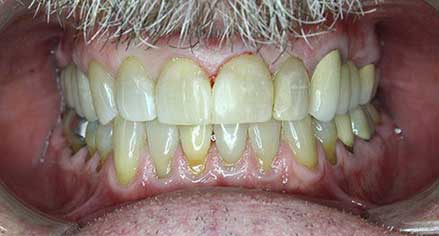
This anterior case: Anterior 6 units of full porcelain crowns to replace older porcelain over metal crowns where recession has occurred and is now showing part of the root surface. This gingival appearance was unsightly to the patient and they wanted their teeth to have a full cohesive appearance without black triangles between the teeth. They asked for a slightly grey (or translucent) look to their crowns so that it matched the incisal third of adjacent natural teeth. This patient did not want the yellow appearance at the cervical margin that you see in many of her other natural teeth. The result was fantastic and the patient was thrilled.


Sometimes lateral incisors or canines form in a cone or peg shape. These are known as peg laterals or peg canines. They can be easily fixed by doing a porcelain veneer over the lateral incisor or canine to replicate the ideal or golden proportions of a tooth. In this case we had an orthodontist align the canines in the perfect position so that we could make picture perfect canines for this 15 year old without prepping the tooth.
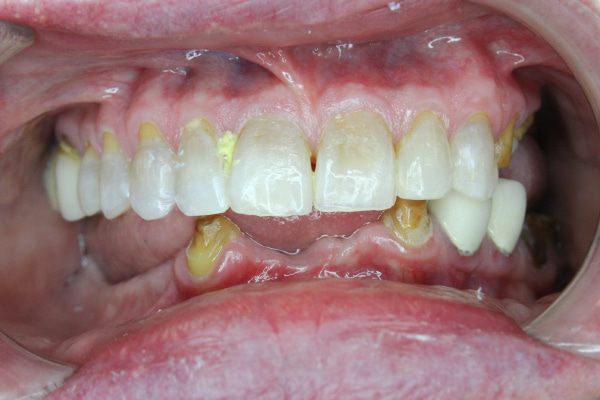
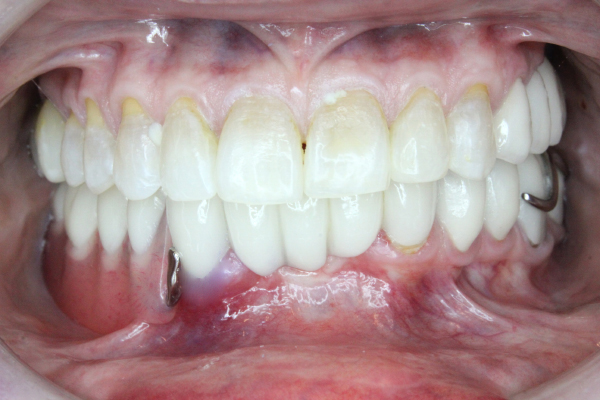
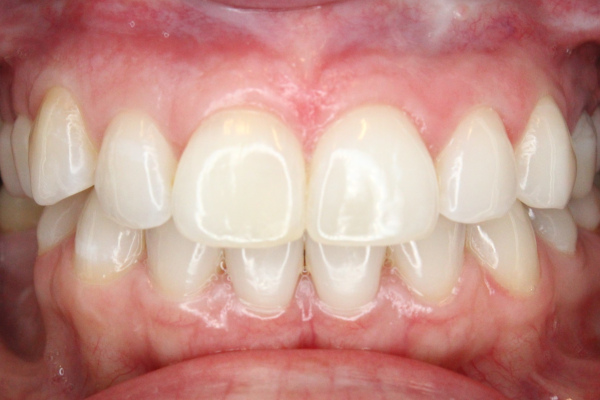
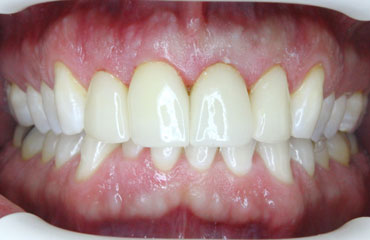
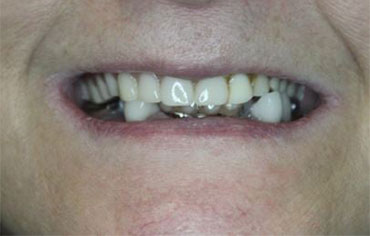
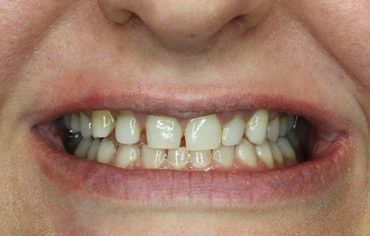
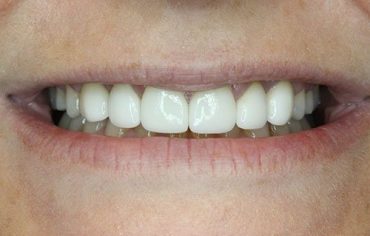
Before and after: Replacing anterior PFM (porcelain fused to metal) crown for full ceramic. On older restorations, the cervical margins may start to show due to recession or a metal collar used on PFM crowns. They look unsightly to many people. In this case, we had two discolored front teeth (central incisors) with a cervical margin that did not look natural. Also, there is a black triangle between the teeth that the patient felt looked like a seed that had gotten caught. We fixed all the problems associated with the teeth with a wonderful and natural result. All of our crowns are all ceramic. These teeth were prepped and the crowns made in one appointment with CEREC technology.
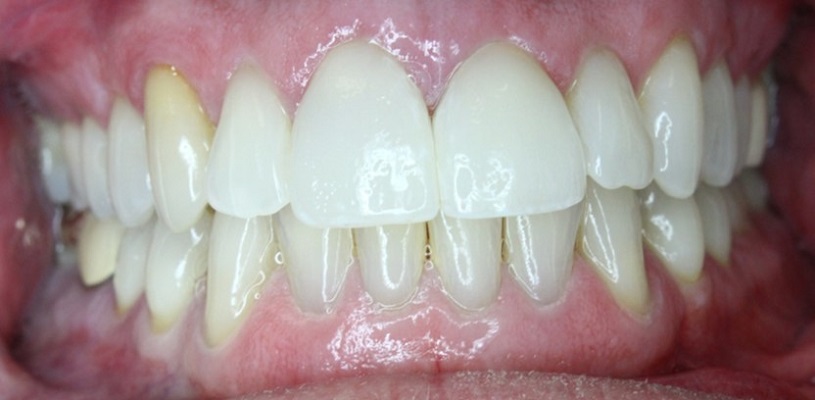
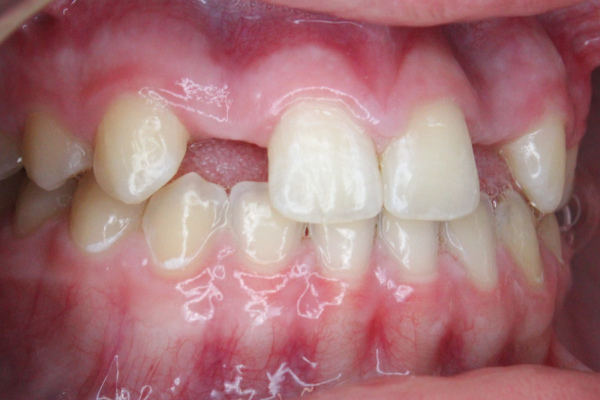
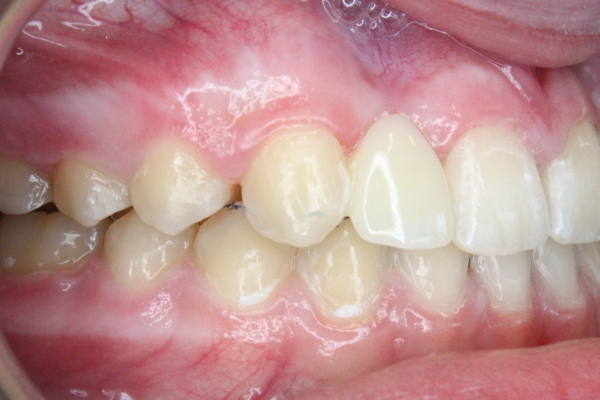
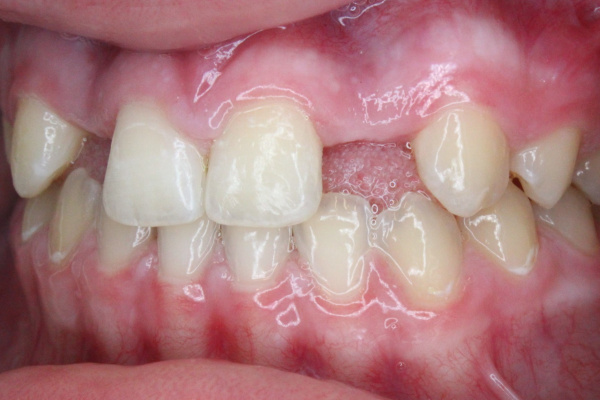
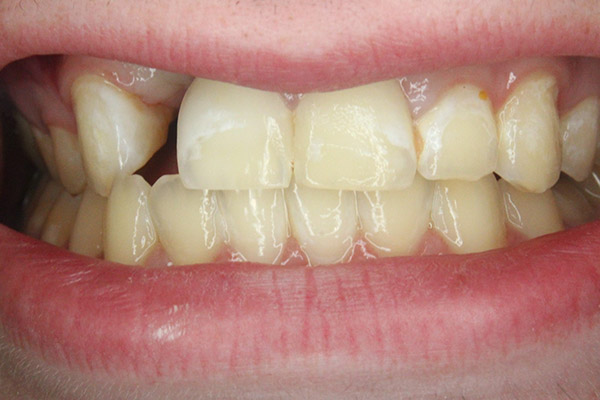
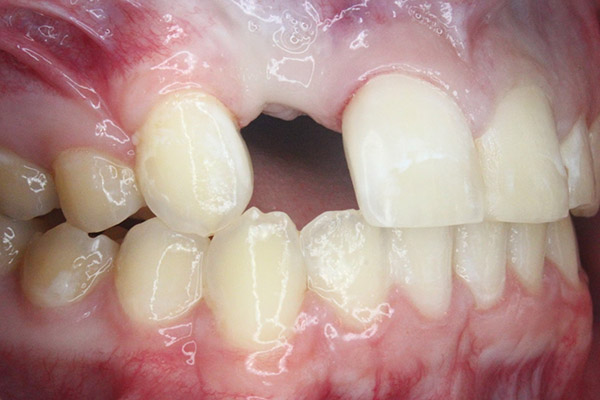
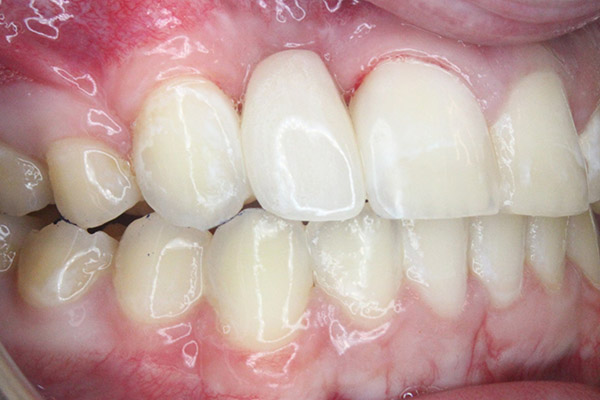
Narrative: This patient was a multi disciplinary treated patient who presented to us with a supernumerary lateral incisor that required extraction. The patient had option to replace with implant or have our orthodontist pull the teeth together and allow us to restore the quadrant back to a functional and aesthetic bite. The images here are after the orthodontist has centered the teeth and we completed restorative treatment to fill in the diastemas that were present between the remaining teeth.
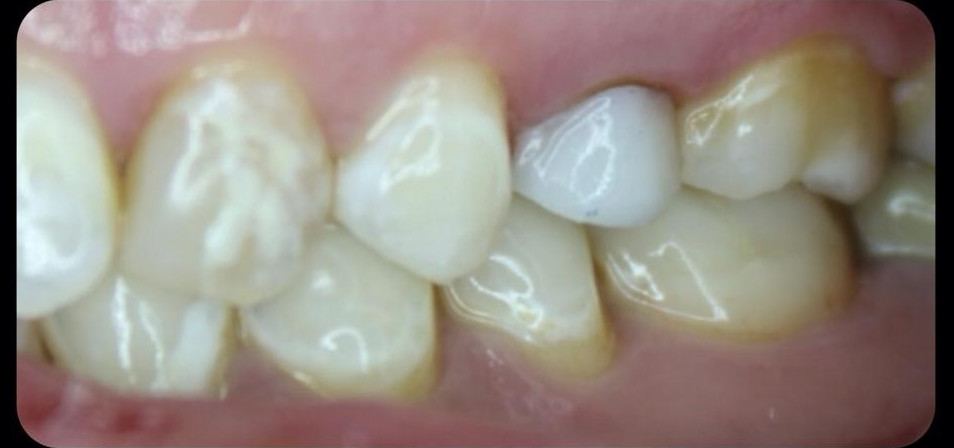
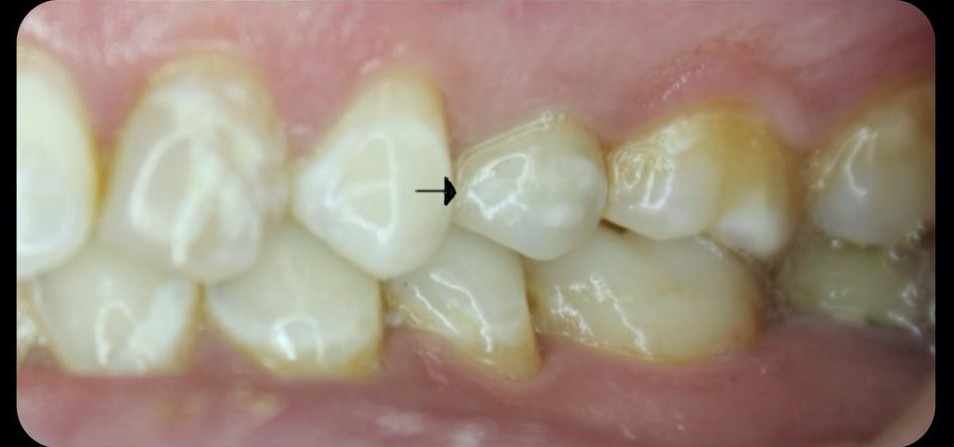
Before and after: Custom Staining. We are able to do most of our crowns in one appointment and can stain and glaze chairside for the most accurate crown and bridge delivery available. This case was replacement of a previous crown that had not been accurately shade matched. We are able to take it one step further. We not only shade matched but also matched the characterization of the tooth. This is standard practice at our office. The patient has white striations within the body of her teeth and she wanted to remain consistent with that look. So we added the white striations and now the tooth blends in perfectly!!!
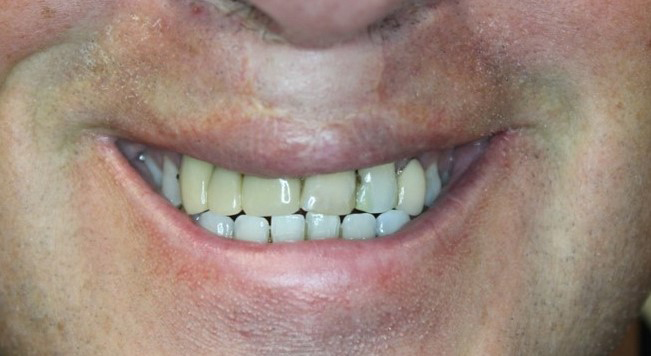
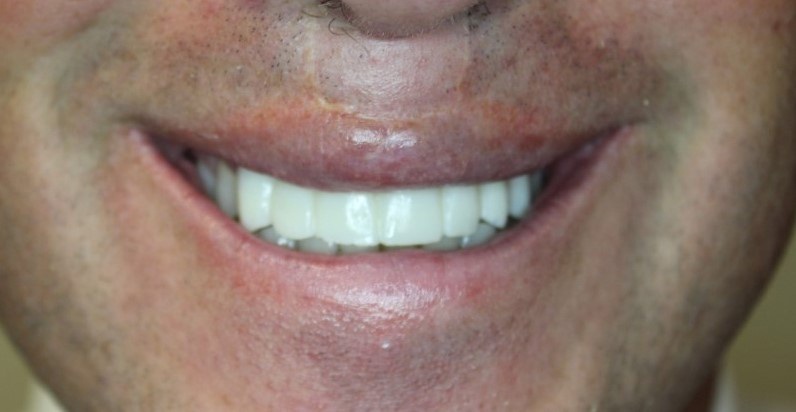
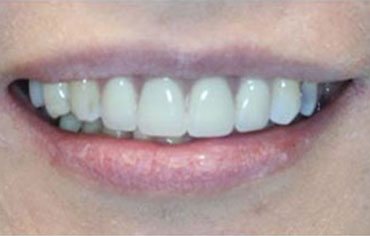
This case was done entirely in-house with clear aligners orthodontic systems to straighten the teeth such as Invisalign or Clear Correct. Our next step was to address the incisal fractures on the front teeth and the darkening of the patient’s left central incisor. This patient had bumped this tooth and caused it to become necrotic. As a result, it turned dark. One of the best ways to manage this discoloration is to put a veneer over the front of the tooth and block out the darker color. Once orthodontics, ie: her clear aligner braces, were complete, we finished with a set of all porcelain veneers over the front teeth that were prepped, fabricated, shade matched, and bonded in place on the same day.
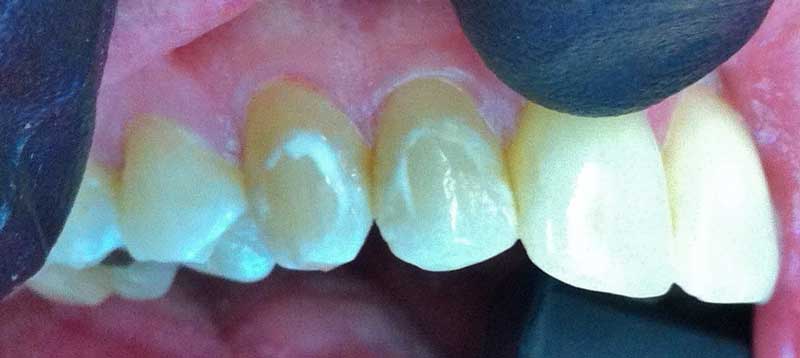
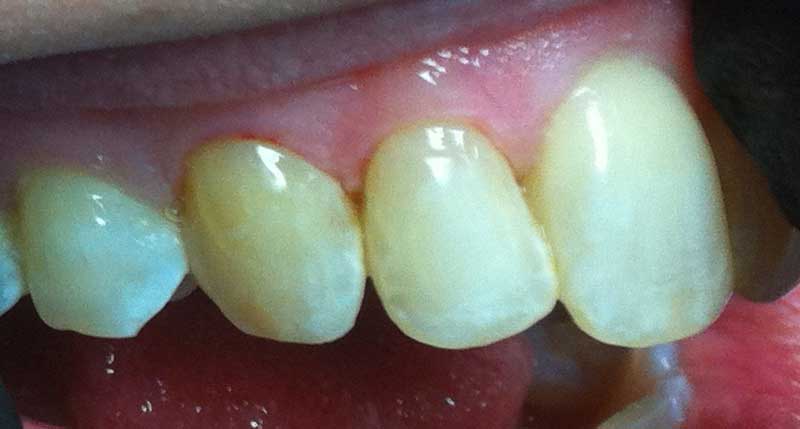
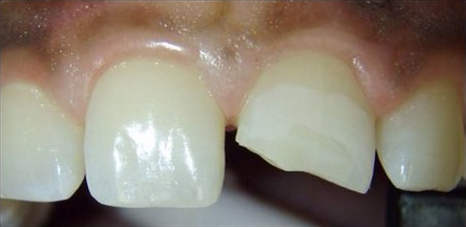
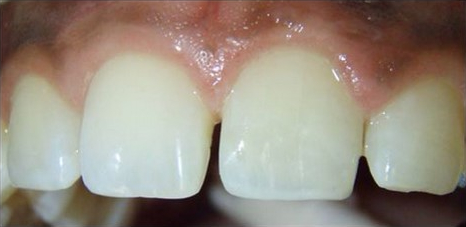
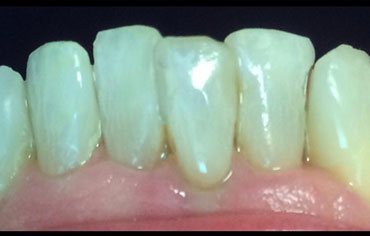
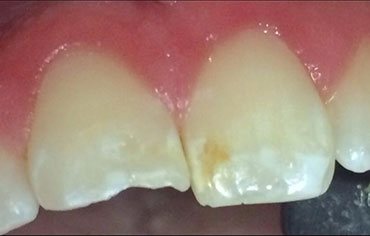
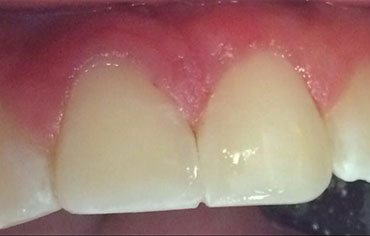
Dental trauma resulting in fracture of anterior tooth: Here is a direct bonding case done without porcelain. These work great when the anterior tooth is not in heavy occlusion and will not be subject to sheer and torque forces that cause incisal bonding to fail. This patient was a young teenager with Ellis class II (dentin and enamel) fracture of the central incisor. The tooth was rebuilt using several shades of composite. We are able to work in the white incisal edge to mimic the adjacent anterior tooth. As you can see from the images, Dr. Lentz has gotten about as close as you can get to rebuilding this tooth to look like it was before it was fractured.

This anterior case: Anterior 6 units of full porcelain crowns to replace older porcelain over metal crowns where recession has occurred and is now showing part of the root surface. This gingival appearance was unsightly to the patient and they wanted their teeth to have a full cohesive appearance without black triangles between the teeth. They asked for a slightly grey (or translucent) look to their crowns so that it matched the incisal third of adjacent natural teeth. This patient did not want the yellow appearance at the cervical margin that you see in many of her other natural teeth. The result was fantastic and the patient was thrilled.
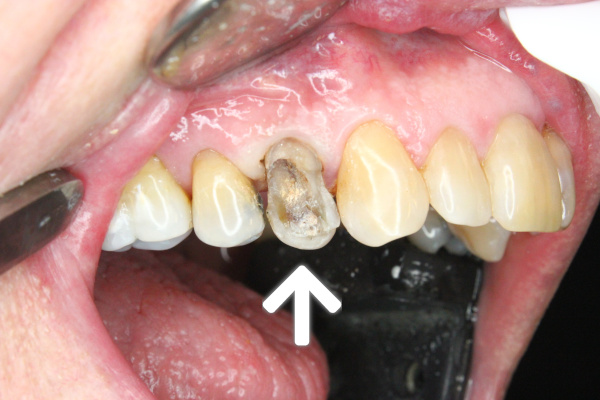
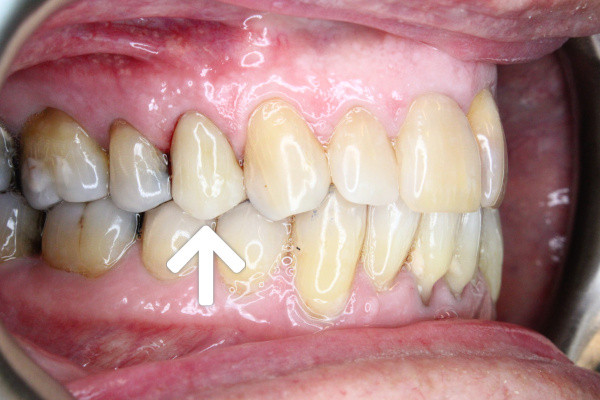
Here is another example of custom porcelain shading and glazing we can do in house. This patient came to us as an emergency with a severely broken down tooth. This tooth will ultimately require extraction, sinus lift, bone graft and implant. This patient desired a great long term temporary that blended in with the adjacent dentition. So the patient elected to get a porcelain veneer for this tooth until we could get the more definitive treatment plan squared away with our oral surgeon. This was completed in one visit.

This patient elected to get what is called a “Maryland Bridge” to replace congenitally missing lateral teeth. This Maryland bridge uses the adjacent tooth, in this case a canine, to bond to and cantilever a lateral incisor made out of porcelain. Many of our patients with congenitally missing lateral teeth come to us after orthodontic treatment to have the teeth replaced with a Maryland bridge when they are too young to get implants. This Maryland bridge will fill the gap without the need for wearing retainers with artificial teeth in them. The Maryland bridge can stay in place for years until the patient’s facial bones are done growing. That growth is typically completed by age 20-25. Once the patient is old enough and the surgeon is ready to place implants, the Maryland bridge is replaced with a implant crown. It is a great option for those patients who do not want to wear a retainer and are waiting until they are old enough to do an implant.


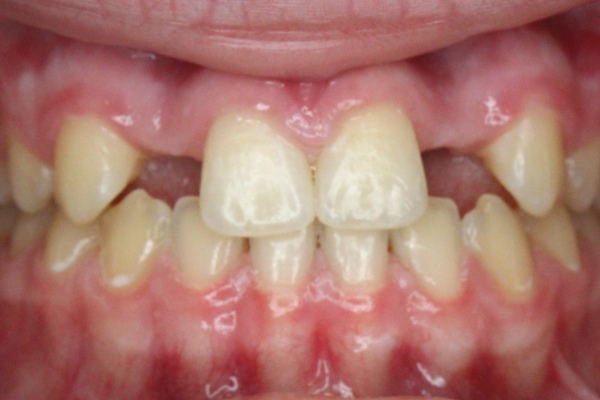
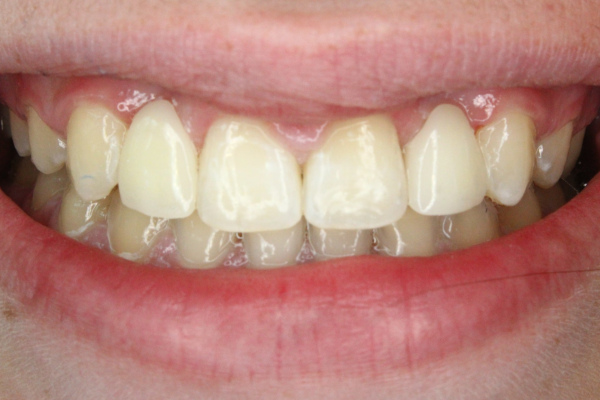
The above three side-by-sides is a multi-specialty patient. This patient presents with what is known as microdontia, meaning that the teeth are genuinely smaller than they should be. In addition, they presented out of alignment. We worked closely with orthodontics to perfectly space the teeth so that when we place the veneers we can be assured that the teeth would be the perfect width. The other area that needed evaluation was the tooth length. The gingiva was recontoured with laser treatment known as a gingivectomy so that the final height of the gum tissue would lay beautifully over the tops new porcelain veneers. The veneer length is determined by the lip line. You can see in the smiling photo that the incisal edge of the upper teeth sits just above the lower lip vermillion. The future treatment option for this patient is to continue with gingivectomy and veneers on the on the premolars to complete the aesthetic smile. The way it sits now is a beautiful result.
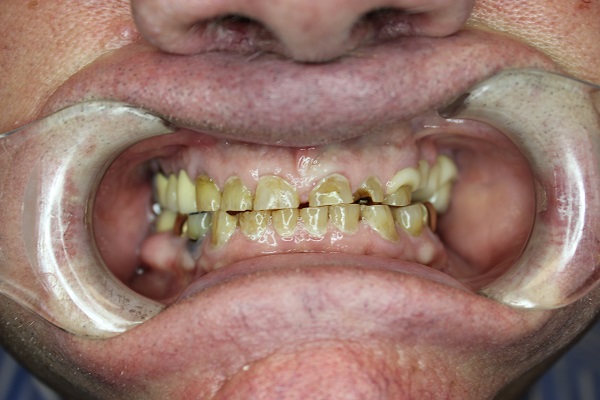
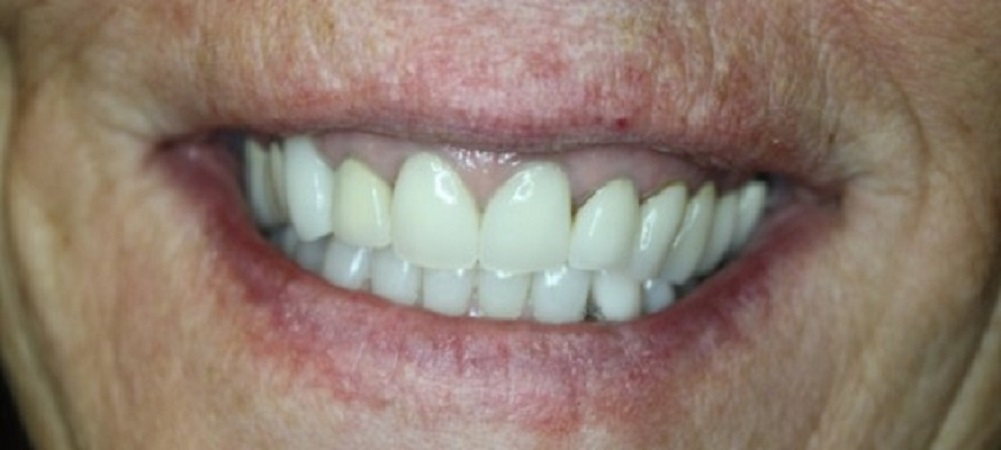
This patient came in upset about the condition of her upper teeth. She was embarrassed and had trained herself to smile with the corners of her mouth pointing down so that it would cover her teeth when she smiled. It was very difficult for us to get her “pre-op smile” because of the way she would hide her teeth. She was explaining to Dr. Lentz that she used to love her smile and was really proud of it, but it had deteriorated over time. Dr. Lentz and the staff asked her to bring in a couple of photos of herself where she was smiling to give us an idea of what she was looking for. The team worked hard to recreate her smile from her wedding day photo and you can see the next time she came into the office, she was no longer smiling with the corners of her mouth turned down. She was letting her new beautiful smile shine for all to see. It was a life changing experience and the Lanier Valley Dentistry team was proud to be a part of it.